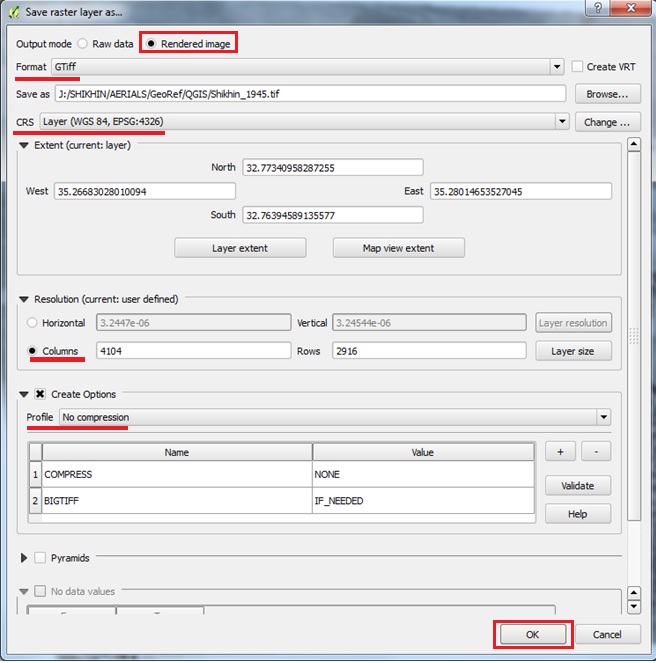
- To EXPORT the raster as a GeoTIFF, right click on the raster layer in the LAYER LIST, then SAVE AS.
- In the Save Raster Layer As dialog, set the OUTPUT MODE to Rendered Image
- For WorldMap, set the CRS as WGS 84, EPSG 4326.
- Set Resolution to COLUMNS and accept the defaults.
- For CREATE OPTIONS set to No Compression. You may also choose to add Pyramids in the next section.
- When you have made all your settings, hit OK and wait for the export to process the GeoTIFF. After completion, ADD RASTER LAYER and add the new GeoTIFF to QGIS... It should have the saved Style included in the Rendered Image.
Thanks to Jeff Howry for "rendered image" tip!
|