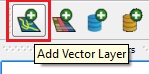
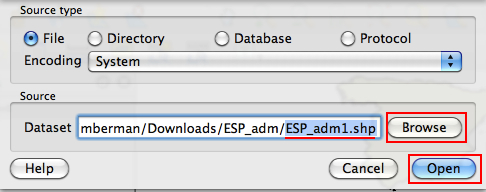
Add another vector layer to your project, this time add the ADM1 (first level administrative divisions).
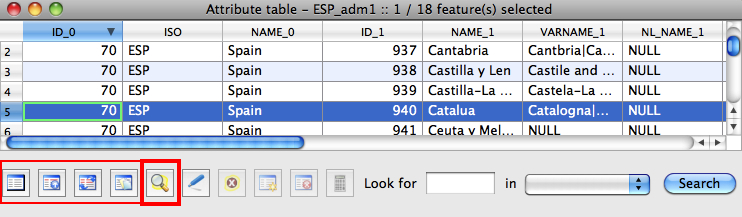
Another way to view all the attributes for the features in a given layer, is to right-click on the LAYER in the LAYER LIST, then select OPEN ATTRIBUTE TABLE from the drop-down choices. Browse the Attribute Table and notice the top row contains FIELD names, and each row contains the values for those field types for a particular features. One ROW = one spatial feature in the chosen layer.

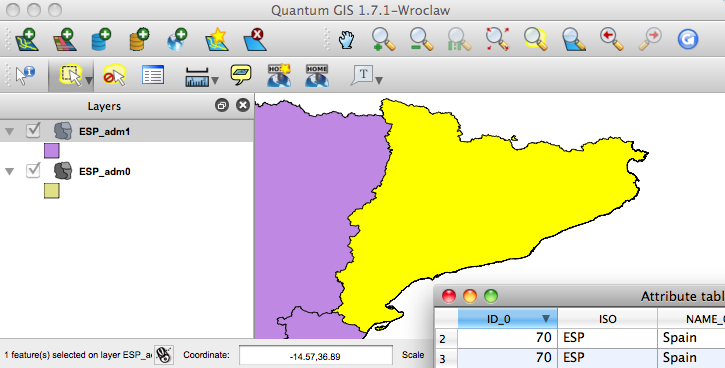
Select a single feature by clicking on the ROW NUMBER at the left side of the Attribute Table. The SELECTED ROW will be highlighted. Now move the cursor over the SELECTION OPTIONS at the bottom left of the Attribute Table. You can UNSELECT, MOVE SELECTED ROWS TO TOP, INVERT SELECTION, COPY SELECTED ROWS, and ZOOM TO SELECTION. Click on ZOOM TO SELECTION, then move the Attribute Table away from the MAP VIEW, by clicking and dragging the gray bar at the top of the Attribute Table window and letting go.
Now the SELECTED FEATURE will be highlighted and the MAP VIEW will be zoomed in to the extent of that SELECTED FEATURE.
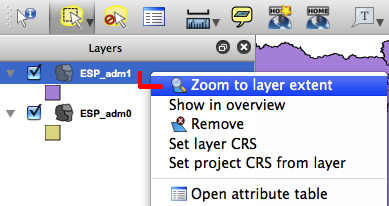
Return to the Attribute Table and click on the UNSELECT button at the lower left. The rows will no longer be highlighted, nor will the spatial feature he highlighted in the MAP VIEW. The ZOOM LEVEL will remain the same. Right-click on a layer in the LAYER LIST, then select ZOOM TO LAYER EXTENT in order to see all the features of that layer in the MAP VIEW.
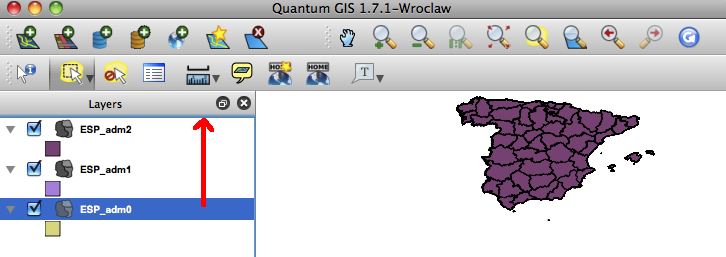
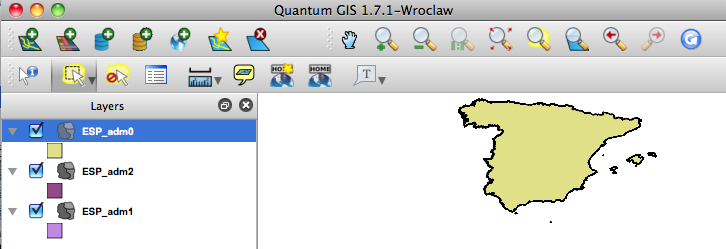
Add another vector layer to your project, this time add ADM2 (second level administrative divisions). Now there will be three layers in the LAYER LIST. Notice that only the TOP LAYER will seem to be visible in the MAP VIEW. Try changing the layer order, by clicking and dragging the bottom layer to the top of the stack in the LAYER LIST and letting go. The top layer should now be shown "on top" of the MAP VIEW. Basically, the LAYER LIST order controls the drawing order for the layers, with the top-most layer in the LAYER LIST drawn last ON TOP of the others.
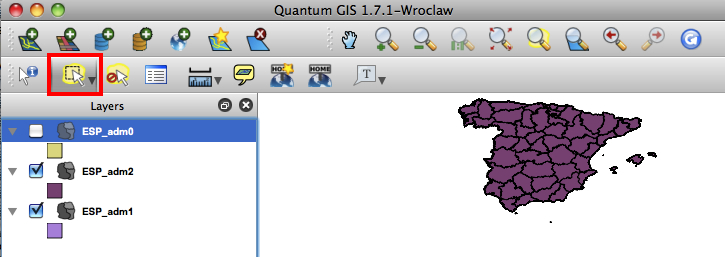
Another way to control the layers shown in the MAP VIEW is to UNCHECK them in the LAYER LIST. Try UNCHECKING the top layer. You should now see the NEXT visible layer in the LAYER LIST. By default IDENTIFY or SELECTION tools will return features from only the ACTIVE layer in the LAYER LIST. Make a layer ACTIVE by clicking on it. Now make the SELECT FEATURES BY RECTANGLE tool active, and drag a box over some features in the MAP VIEW.
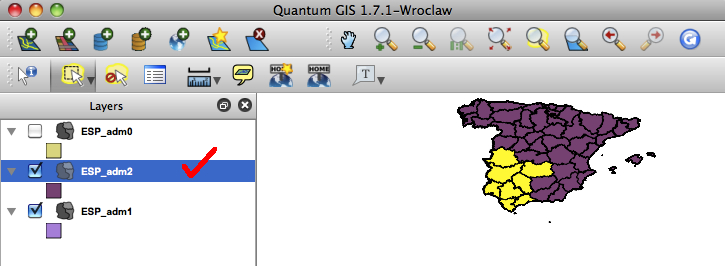
Right-click on the ACTIVE LAYER and OPEN THE ATTRIBUTE TABLE. Click on the MOVE UP tool to see the highlighted rows that appeared on the map. Now click the UNSELECT tool. Try making the BOTTOM LAYER in the LAYER LIST active by clicking on it, then use the SELECT BY RECTANGLE TOOL AGAIN. Note that in the MAP VIEW no spatial features seem to have been highlighted. Try UNCHECKING all the layers in the LAYER LIST except the ACTIVE LAYER (the bottom layer). You should see that features were being selected, but they were not visible due to the drawing order. (See also the Layer Order video)
Proceed to QUERY BUILDER tutorial.
|
| CGA Harvard University | Instructor: Lex Berman |

|