Overview
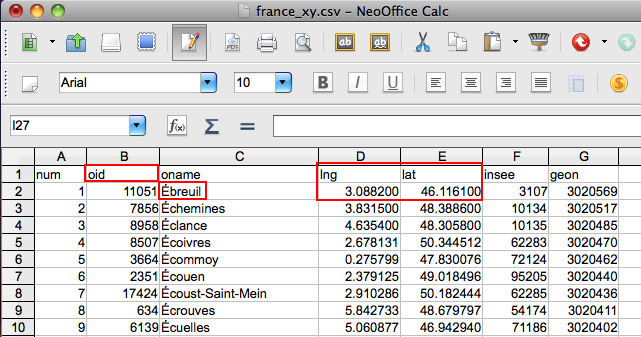
- Prepare a table containing rows that include at least fields for: Unique ID, Latitude, and Longitude.
- Lat & Long values should be in decimal degree format (NOT degrees, minutes, seconds, format)
- Example of row with correct Lat & Long values: 23, Berlin, 52.500556, 13.398889
- In the preceding example, 23 = unique ID for Berlin, Berlin = Placename, 52.500556 = Lat, 13.398889 = Long
- Save this table in Comma Seperated Values format (CSV)
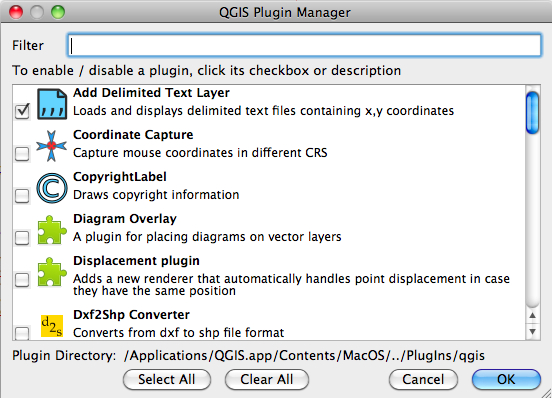
- Add the QGIS Plugin "Add Delimited Text Layer"
- Launch the Delimited Text tool and upload the CSV file to generate a points layer.
- Save the points layer to a Shapefile (or other format) for future use.
Preparing tabular data
- Tabular data can be developed in various spreadsheet applications, for our example OpenOffice was used.
- Make sure to Format the Cells for your Lat Long values with enough decimal places, so that saving to CSV does not trim off your most accurate values.
- Currently QGIS imports CSV as UTF-8 Encoding. If you are using ANY OTHER encoding, create TWO tables: one for the LAT LONG import, and one to join the other character set attributes to the resulting points layer (see JOINS for details on how to accomplish the second JOIN process).
- In the example shown below, the placenames are in UTF-8 encoding, so it is not necessary to split the placename column into a second table (which must have BOTH the values in their needed encoding, and the JOIN ID)
- In the example, the UNIQUE ID field is "oid" Make sure you know which field contains your JOIN ID, which must be unique for each row.

Add Delimited Text Plugin
- Under the Plugins | Manage Plugins menu, make sure the ADD DELIMITED TEXT plugin is checked, and click OKAY

Import CSV File
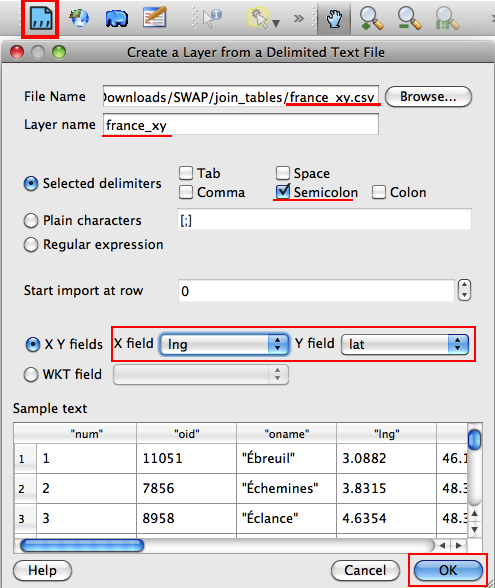
- Click on the ADD DELIMITED TEXT tool on the plugins toolbar
- Browse to the CSV FILENAME you want to import
- Accept or change the Layer Name that will appear in the Layer List
- Pick the correct DELIMITER that separates each field (in the example we used semi-colons)
- Double-check the FIELDS that were found for the X, Y fields (in our example X = lng, Y = lat)
- Take a look at the SAMPLE TEXT to see if it looks correct, then click OK

Check points and attribute table
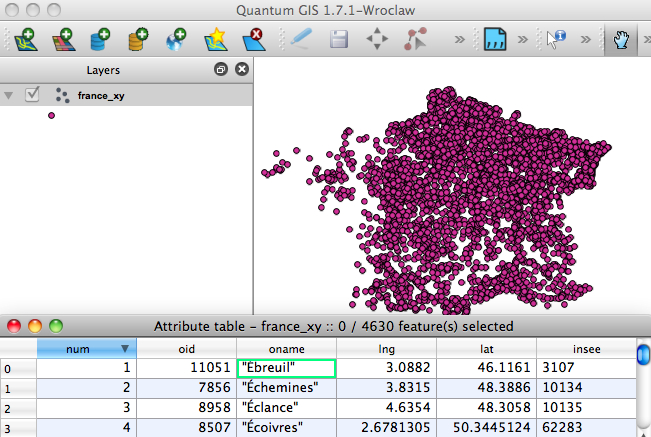
- The imported x, y values will now be converted to point features (in WGS84 coordinate system)
- Right-click on the layer to Open the Attribute Table, and make sure the tabular data was imported
- Check the Number of Features on the top bar of the attribute to make sure all were mapped (4630 features in our example,)
- Since our import file was UTF-8 Encoded, note the French accents in the placenames are fine
- [Thanks to Regnum Francorum for this sample data of historical placenames in France!]

Note: the first attempt to import data in this example created 4387 features. Examining the source data revealed commas used in the Placename Cells. QGIS will, by default, treat COMMAS as delimiters [even if another delimiter is selected in the import settings]. By removing the commas in the source file and saving out to CSV again, the import resulted in the complete set of features expected.
Save out to SHP
Note that QGIS is holding the points layer created in memory. You may want to right click on the layer and SAVE AS a SHAPEFILE (or your preferred format) for later use.
|


