Spatial Join
A common GIS task is to join the attributes from one spatial data layer to another. In this example we will join attributes from a polygon layer to a points layer, based on which polygon contains the points.
Prepare Target Points Layer
- For this exercise, we'll use a set of points showing power plant sites in Taiwan from the CARMA database
- Add Vector Data, set UTF-8 encoding, and browse to part_three/Taiwan_CARMA_Xian80.shp
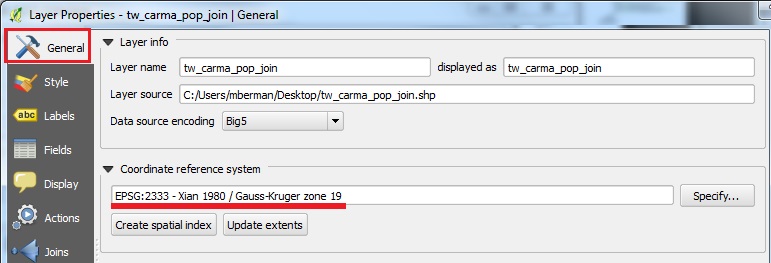
- Right click on the Layer in the Layer List and the General tab, to check the Coordinate Reference System (projection) for this layer
- Note that it is in Projected CRS, EPSG:2333. Cancel the Properties Dialog window.
- Target Points layer should be ready for the join
Check Join Layer
- Now we want to Add Vector Layer and browse to the part_three/TW_POP.shp layer, encoding = big5
- Click on the TW_POP layer in the layer list and drag it below the Taiwan_CARMA layer. Now the points should be on top of the polygons in the Map View.
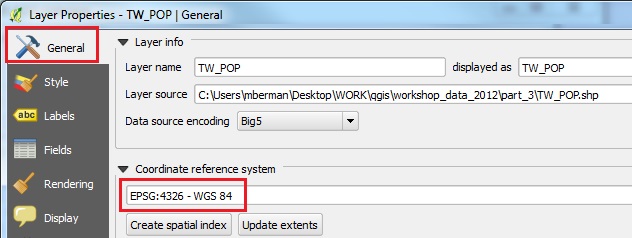
- Right click on the TW_POP Layer in the Layer List and the General tab, to check the Coordinate Reference System (projection) for this layer
- Note that it is in Geographic CRS, EPSG 4326 WGS 84
- This is NOT the same projection as the target layer, and we need to reproject the join layer before we attempt the spatial join.
Reproject Join Layer
- Click OK or Cancel to close the Properties window.
- Right click on the TW_POP layer and choose SAVE AS, then fill out the information for the layer export as follows:
- The Format should be Esri Shapefile. Under SAVE AS, BROWSE to your desktop and give the file a name: TW_POP_NEW and hit OK. The Encoding should be set at BIG5.
- Now click on the CRS drop-down list to choose SELECTED CRS, then BROWSE.
- Under "Recently Used" scroll down to click on the Xian 1980 Gauss Kruger, EPSG:2333 projection, accept this CRS with OK. Now the export process should run and you will get a small warning on your Map View when the layer has been saved to disk.
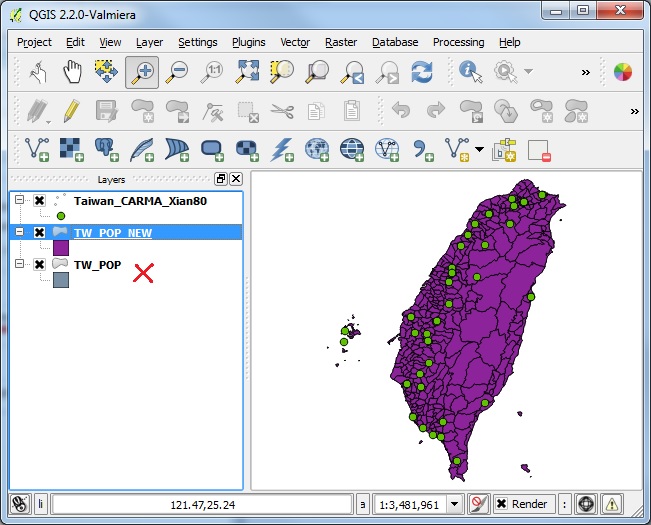
- Add Vector Data and browse to your TW_POP_NEW Layer to add it to your project. You should now have three layers in your layer list.
- Now we can right click on the original TW_POP layer to remove it from the project. You will be asked if you want to Remove One Object, click OK.

Run the Join
- Your project should now have two layers in the EPSG:2333 projection -- Taiwan_CARMA and TW_POP_NEW.
- We can now proceed to use the JOIN ON LOCATION function (aka SPATIAL JOIN)
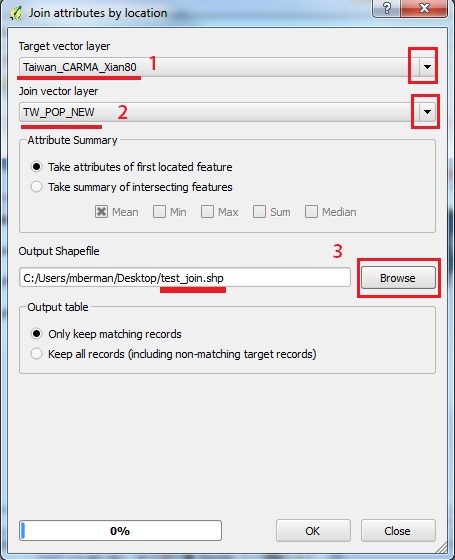
- Go to menu VECTOR | DATA MANAGEMENT TOOLS | JOIN ATTRIBUTES BY LOCATION
- Set the TARGET LAYER = Taiwan_CARMA_Xian80.shp, set the JOIN LAYER = TW_POP_NEW
- Click on the OUTPUT SHAPEFILE BROWSE button to set output location and filename, like: "test_join", and set encoding = big5, then click SAVE
- Click OK and you will be prompted to add the new join shapefile to the TOC (table of contents), click YES
- Open the Attribute Table of the new join layer, "test_join." Scroll to the right, and you should now see that the all the columns from the TW_POP_NEW layer have been added to the table, and each point feature now includes the attributes for the polygon that the point was located in.

|
